
Every OS update tries us to catch every stop of it and discover what’s new in it. That’s what we try to gain it for testing and discovering its marvelous updates or features, but to do that you might have to wait until it completely comes inside your phone or computer, can you wait for it? or you want to go from another option instead. And that the second option is to install it on your PC in VirtualBox like installing Android 7.0 Nougat on VMware we did. As you have always used your phone means you’ve installed the updates on your phone and used it, how about installing it on your PC? Have you ever test the taste of your phone OS or new upcoming update OS on PC? Like we did it on VMware, this time again we’re going to install Android 7.0 Nougat on VirtualBox here within the steps shown to you.
Install Android 7.0 Nougat on VirtualBox Right Now
-
Create, Customize the Virtual Machine
1. To install Android 7 Nougat, you’ll need some files during the installation, here are they:
Download Android 7.0 Nougat ISO Image File
Download & Install VirtualBox 5.1
2. Now run VirtualBox and click on New, on the window describe the virtual machine and type like the shot and hit Next.

3. Specify the amount of memory your computer can catch up(Recommended 1GB) and click Next.

4. Just let it by default and go Next with creating a new virtual hard disk.

5. No need to do any changes, let the hard disk type VDI just hit Next.

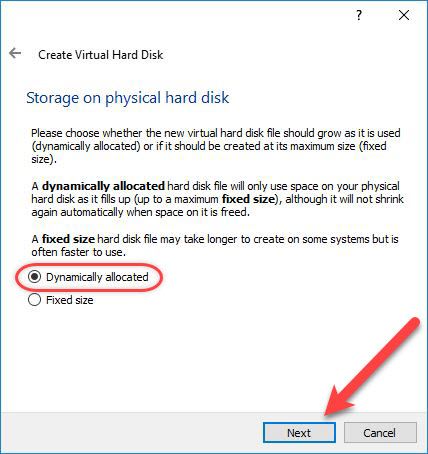
6. At this point, let it dynamic because it’s beneficial for us to use everything, and continue by hitting Next.
7. Browse the location and name the virtual machine then click Create.

-
Install Android 7 Nougat on VirtualBox
All right, our virtual machine has created and now we’re ready to approach to our target be active and go carefully now until ending.
1. After hitting create, the VM will be created, now click on Settings and select Storage options and click on Remove icon, see the shot.

2. When removed, click on Add button and select Add IDE Controller.

3. On the controller, click on Add Hard disks icon and choose existing disk option.

4. Locate to C:/users/VirtualBox VMs>Select VDI(Virtual Disk Image file and click Open.

5. Here click on Add optical drives icon and click Leave empty.

6. Select the empty file and change the option drive option to IDE Secondary Master then click on the Disk icon >Choose Virtual Optical Disk File>Choose ISO Image file of Android Nougat.

7. Time to start the virtual machine hit Start button to boot up, when the screen appears, click on the screen and go down with the arrow keys on the Installation – Install Android -x86 to harddisk and hit Enter.

8. Select Create/Modify partitions like the same and hit Enter.

9. And No for GPT hit Enter.

10. In this page, just go on New with the arrow key for a new partition and hit Enter.

11. And select Primary type partition and hit Enter.

12. Just hit Enter for the partition disk size.

13. Here hit Enter on bootable to make the parition bootable.

14. In this page, go on Write and hit Enter to write partition table to disk. When you’ll be asked, type Yes and hit Enter.

15. Quit the partition by hitting Enter on it.

16. When the partition choosing page came up, just hit Enter, then in the file system choosing page, choose Ext4 and hit Enter.

17. Hit Enter on formatting partitition sda1.

18. Also, hit Enter on installing bootloader.

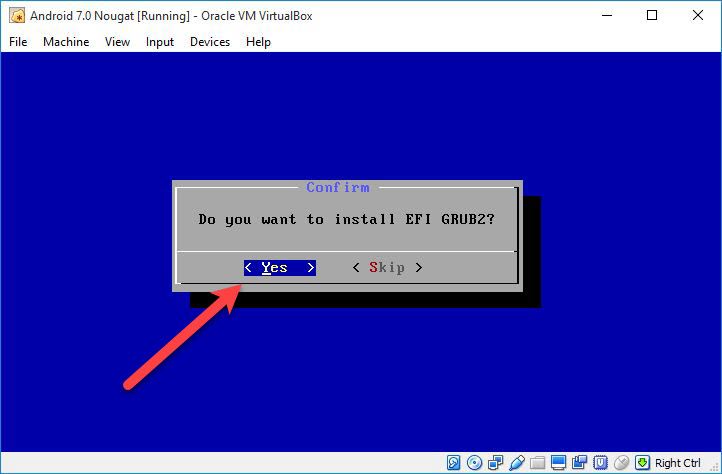
19. Yes to install EFI GRUB2.
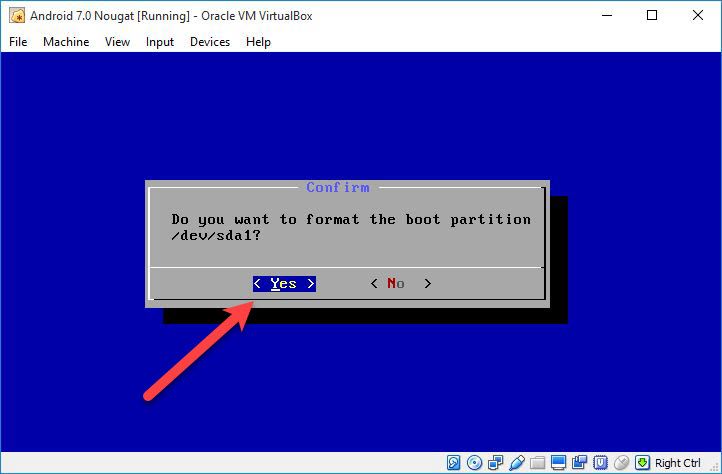
20. Format the boot partition by hitting Enter.
21. And for installing system directory as read-write hit Enter for it.

And you’re done, just remove the disk from virtual drive and then Reboot it.

Surprise that’s Android 7 Nougat running on VirtualBox.

All right, if you have any question or suggestion or idea regarding this you can tell me by comment.


Hi Karar,
Firstly, thanks a lot for your interesting sharing on this topic.
I am sorry but found my virtual Android stuck after rebooting.
The error message shown in command line said “FATAL: No bootable medium found! System halted.”
Basically I followed every steps in your post.
I also set the partition to be bootable such that “Boot” can be seen in the column “Flags”.
FYI, I am using Intel i7 PC with Windows 10, 8GB RAM and a 240GB SSD with about 170GB free space.
Not sure if the above information helps but do you have any idea on why it doesn’t work?
Thanks for your opinions in advance! 🙂
i keep getting
grub loading please wait ….
error 17
I am getting the same error message:
GRUB loading, please wait…
Error 17
Solved
GRUB loading, please wait…
Error 17
In step 19 where it says… 19. Yes to install EFI GRUB2
IMPORTANT… It should say 19. Skip to install EFI GRUB2
If you Choose Skip instead then it works fine.
All steps worked fine for me and is able to work on the VM
Only issue I face is if I leave the VM idle for 5 mins, (I am not sure if its going to sleep) the display goes black and the VM is unresponsive until I reset it.
Anyone having the same kind of issue?
After step 8 , it logs some thing in blackscreen and never proceeds to partiotion screen,
and even if only boot from the disk – which I downloaded from net with pre installed nougat never boots.
when I try your steps after step 8 it goes fror restart with a message kernel panic, – not syncing….
rebooting in 5 seconds….